Samstag, 22. Mai 2021

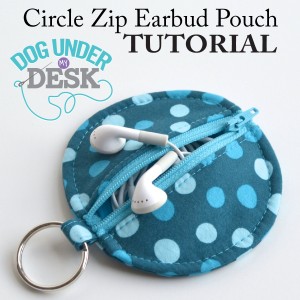
Circle Zip Earbud Pouch Tutorial

I use a little zippered pouch to carry around my earbuds since they are the fancy microphone ones and I don’t want them to break or get tangled. Some of you have commented that you are looking for some small, simple gift ideas. This is definitely simple to make, and a little more fun than the typical rectangular zippered pouch! I can see these as the perfect gift for teenage cousins or nieces or girlfriends or even teacher gifts. Fun, quick, and cute! It doesn’t take very much fabric so you could even use scraps! Sometimes I have the perfect fabric for something but I only have a fat quarter, or I want to make something extra with the leftovers from another project. This is perfect for that. You could even use 5″ charm squares! You can enlarge any of the photos by clicking on them, if you need to. This is a very basic zippered pouch, so hopefully some of you beginners will try making one!

UPDATE: I have completely re-written this tutorial with twice as many bright, clear photos and more detailed instructions and it is available as a pattern in my pattern shop. The free tutorial is still available below!
First, download the pattern template HERE.

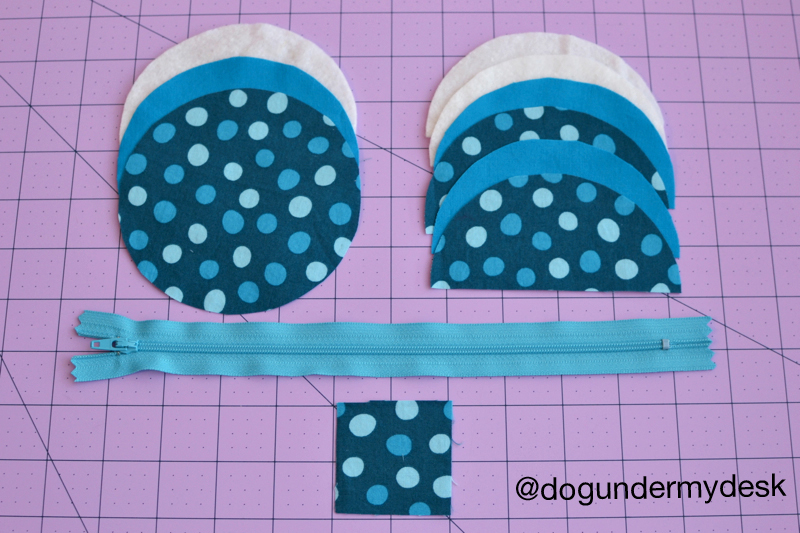
Cut from main fabric:
1 circle
2 half circles
1 tab

Cut from lining fabric:
1 circle
2 half circles

Cut from batting (or medium weight interfacing, if you prefer): 1  circle
2 half circles

You will also need a 1″ wide nylon 5″ or longer zipper.
Place one lining half circle right side up and place the zipper right side up on top. Align top edges.
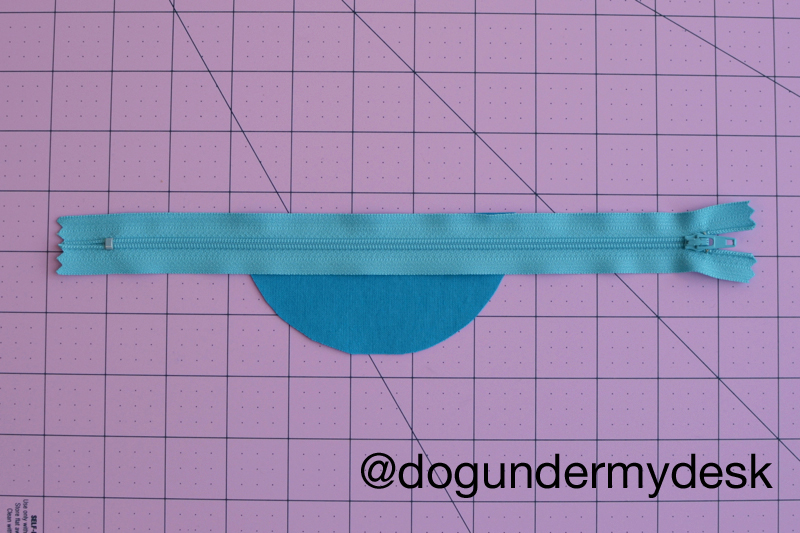
Place a main fabric half circle wrong side up (right side together with the zipper). Place batting on top.

Sew with a 1/4″ seam allowance. It’s important to use a 1/4″ SA here because the zipper is 1″ wide, and if we use two 1/4″ seam allowances we are subtracting 1/4″ from each half circle but adding 1/2″ in the middle of the zipper. Perfect!

Fold back and repeat with the other side. Then trim the batting as best you can without cutting into the fabric.

Fold everything back and press well.

Make sure the back side is away from the zip as well.

Topstitch 1/8″ away from the edge with a longer stitch length.

Now make the tab for the side. Fold the tab in fourths – Fold the edges to the center and then fold in half and topstitch.

    
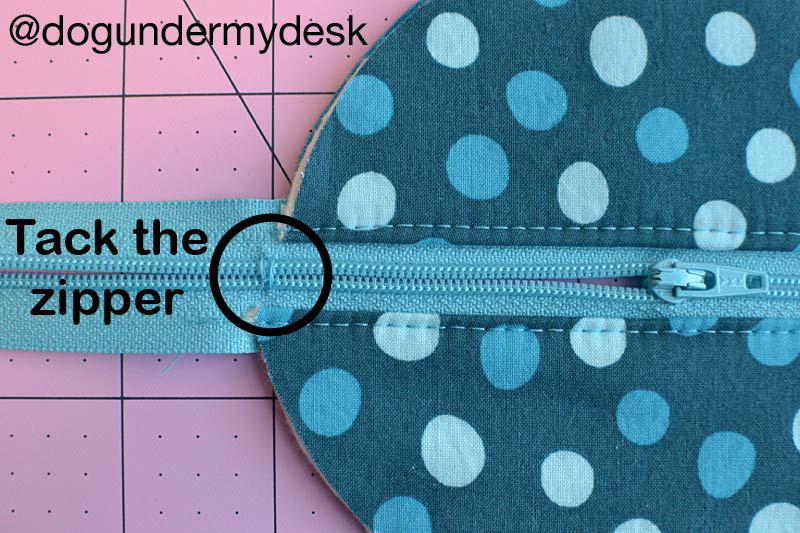
Now unzip the zipper part way and “tack” the zipper closed at the edge of the circle.

Fold the tab in half and place it with the raw edges towards the outside of the circle, folded edge in, right over the zipper and sew it at the same spot where you tacked the zip.
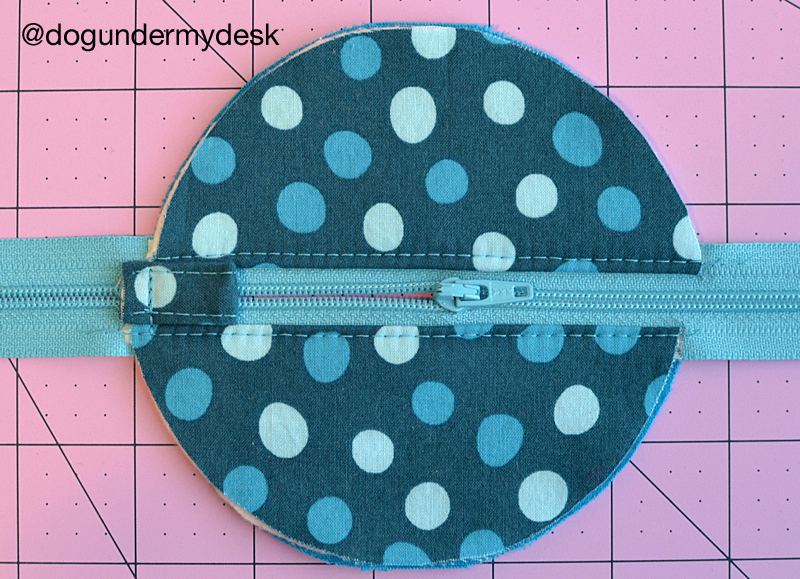
Now you need to place the circle pieces wrong sides together with the batting in the middle. Place the lining circle wrong side up. (I’m using solids so it doesn’t matter, but if you are using a print, place it right side DOWN, wrong side up.) Place the cotton batting on top. Place the main fabric circle on top of that. Like a quilt sandwich. It’s so small you don’t really need to pin. If you used fusible interfacing in place of batting, just place the two fabrics wrong sides together.


You should now have these two pieces. Make sure the zipper pull is IN THE MIDDLE of the circle. You don’t want to end up cutting it off!

Flip the full circle piece over on top of the piece with the zipper, right sides together. (Now, if I was showing you how to do this the “right” way, I would tell you to baste with a 1/8″ seam allowance around the outsides first. But this is a small pouch, and it will be fine if you don’t baste. Plus, it’s just for fun. Not basting also makes it easier to trim the batting after sewing!)

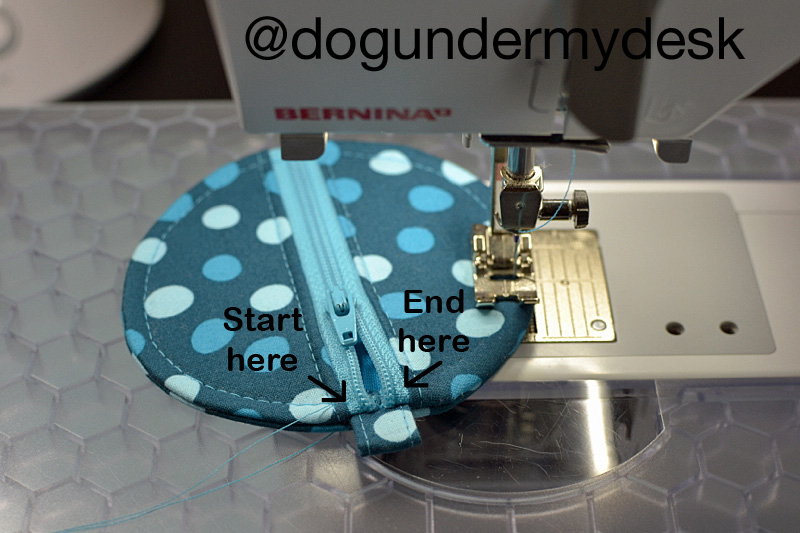
Time to sew! Start anywhere on the circle and sew all the way around with a 3/8″ seam allowance.
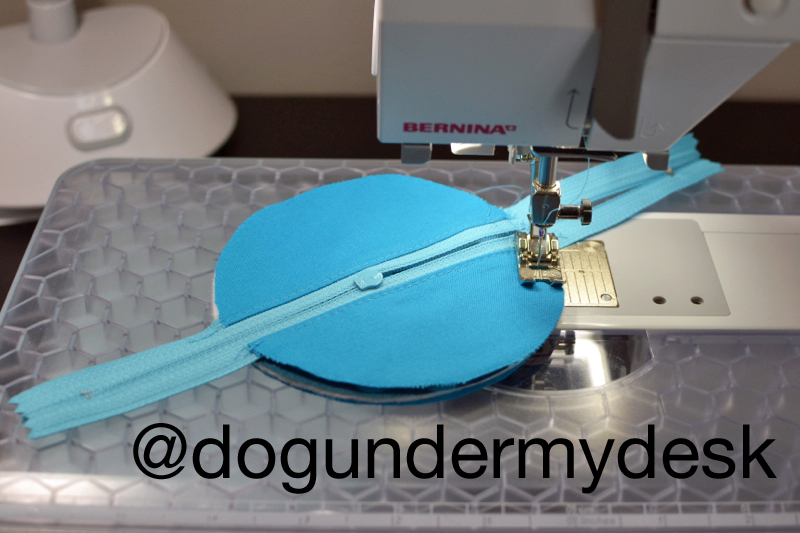
Since we didn’t use interfacing AND we are sewing in a circle, you might get some puckering (fusible interfacing helps keep the fabric stiffer so it doesn’t pucker as much.) It’s OK. Just lift up the presser foot every few stitches, pivot, smooth out the pucker and keep sewing.

    
Since there won’t be a ton of reinforcement at those zipper edges, I like to stitch across them a couple times. Just hit your backstitch button a couple times, taking a few stitches across them back and forth.

Now cut off the zipper ends. Just don’t use your good fabric scissors! I keep an extra pair of scissors around of opening packages, cutting paper and cutting off ends of zippers.

Now pull back the fabric and try to trim as much batting out as you can without slicing fabric. I use sharp, tiny scissors for this. It’s not imperative but I think it helps reduce bulk.
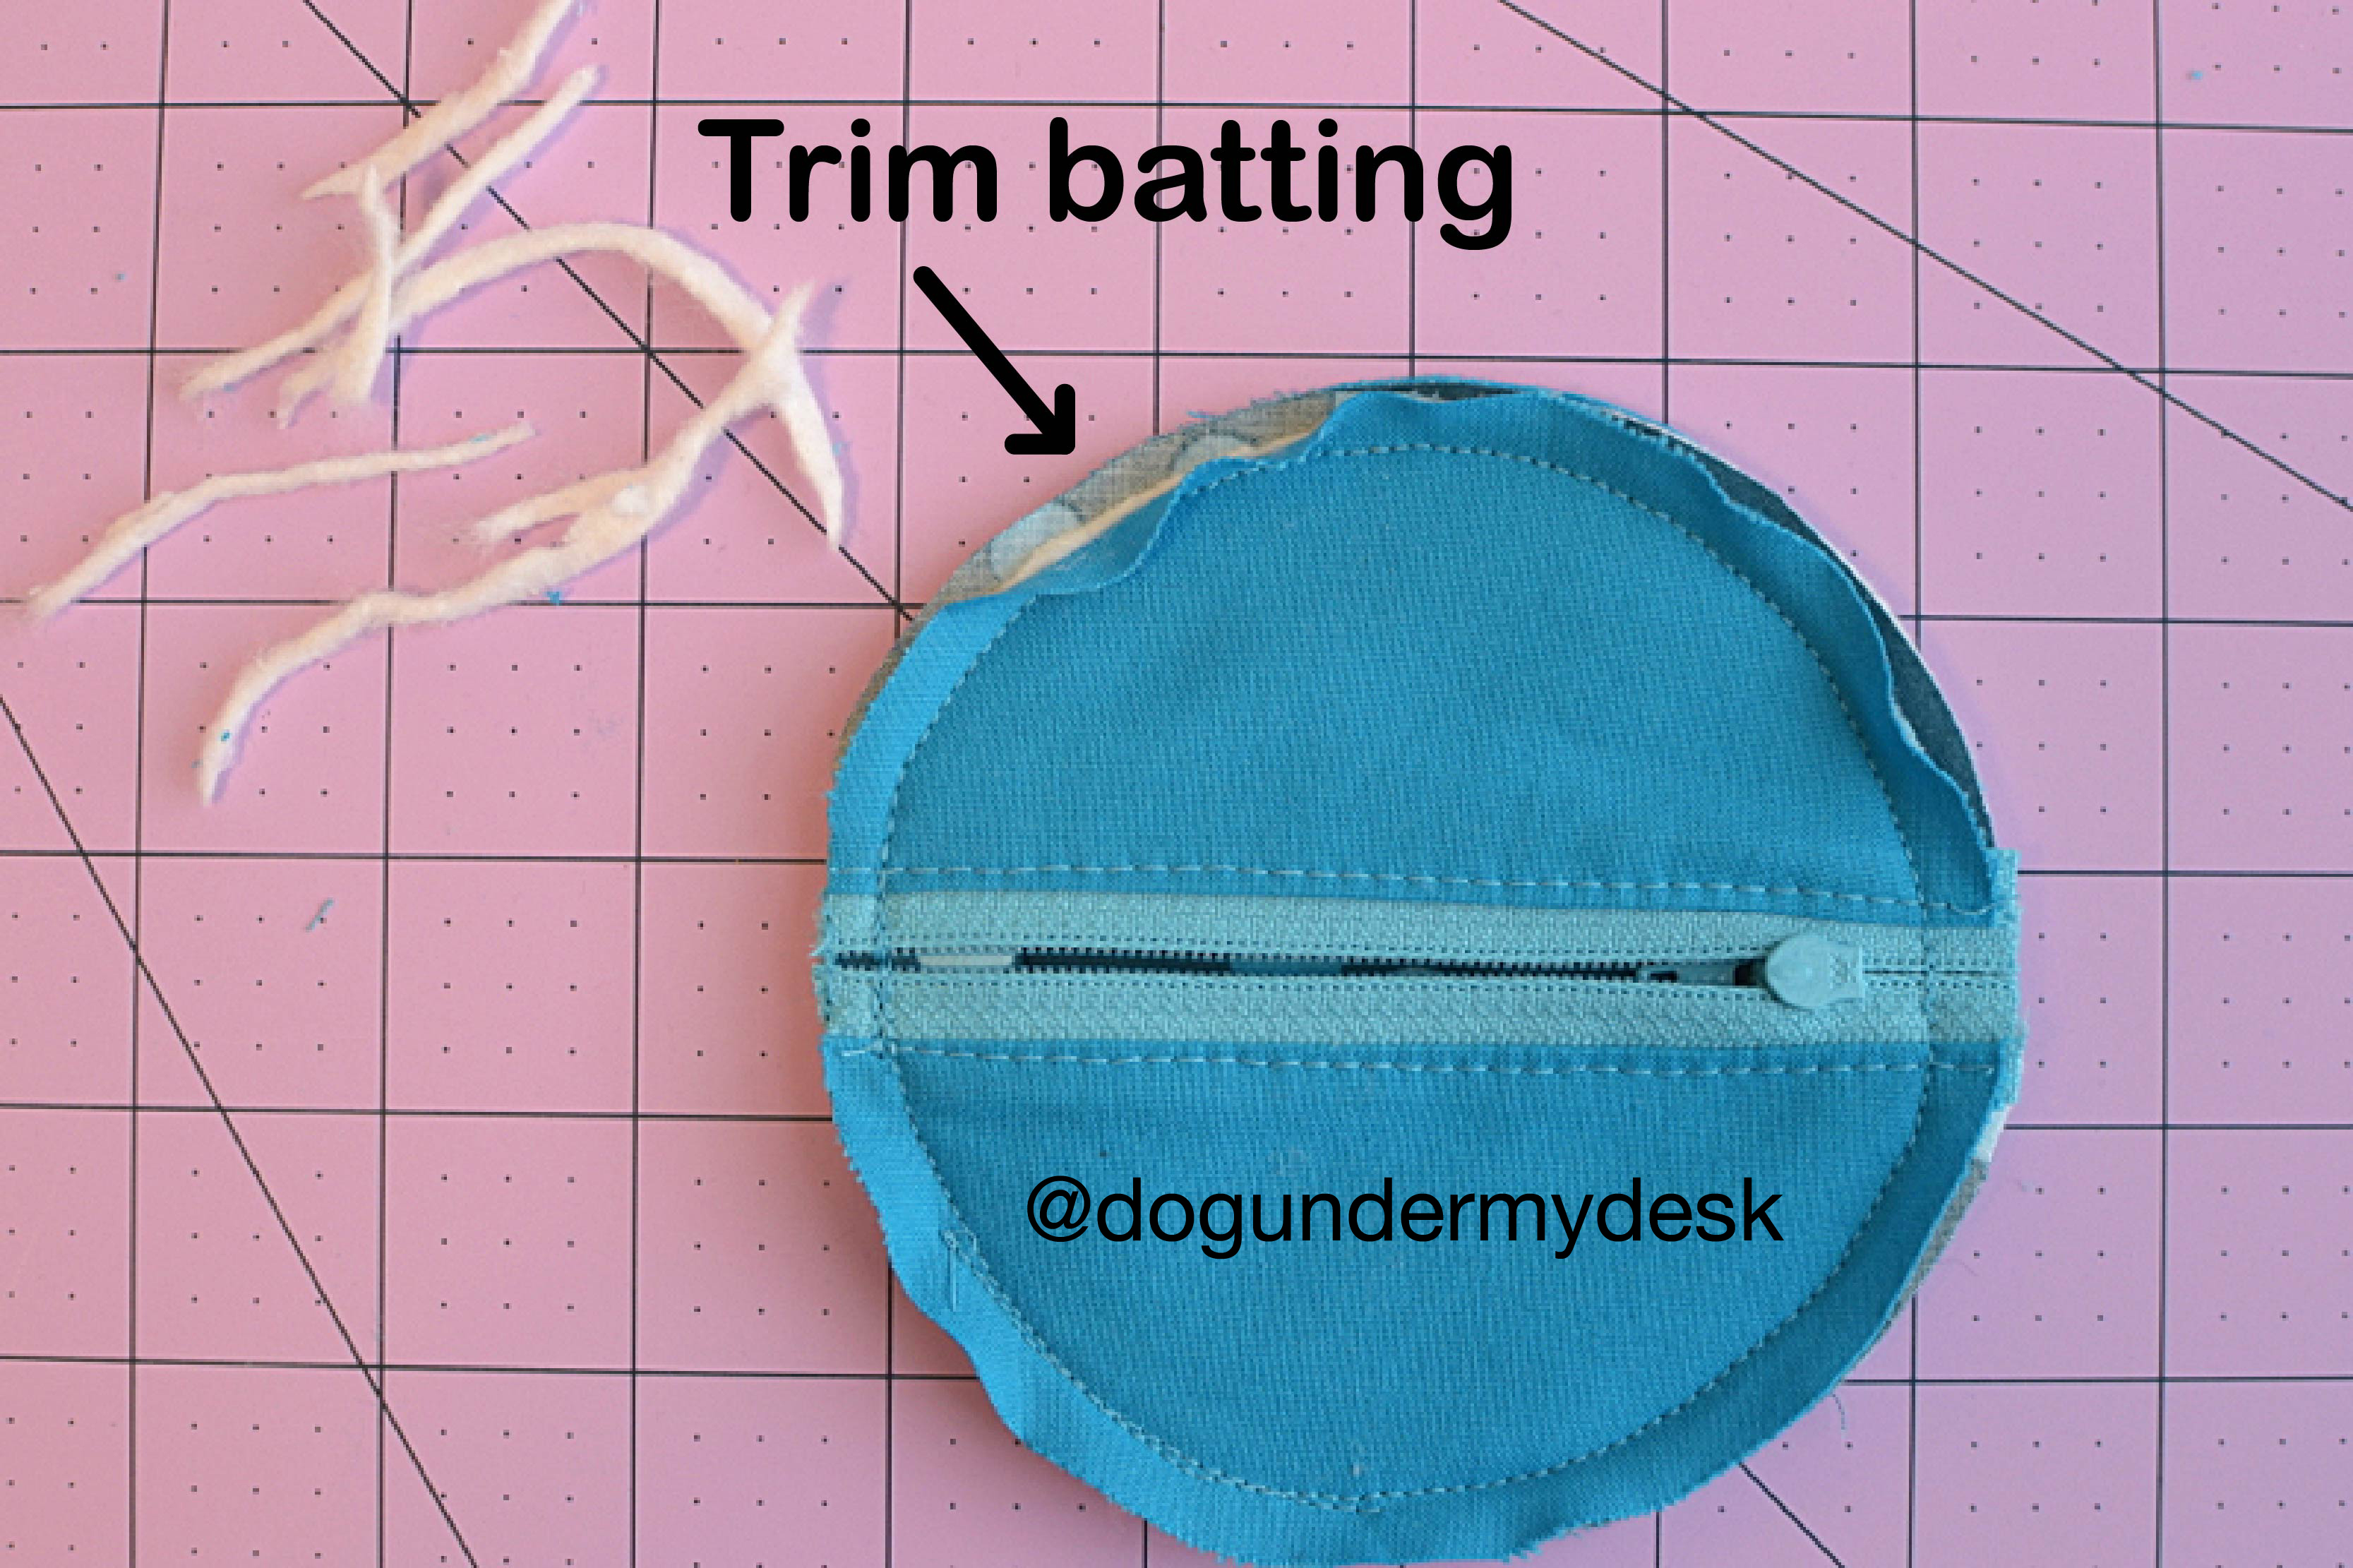
Trim the seam allowances a bit less than 1/4″. I used pinking shears but it will be fine if you don’t – just clip the curves. Turn the pouch right side out. Topstitch around the outside with a 1/4″ seam allowance to enclose the raw edges.

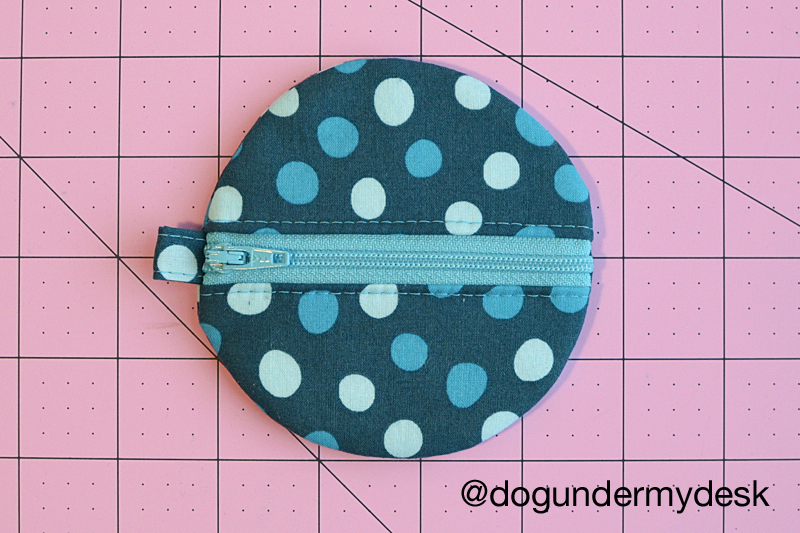
  
When I topstitched, I didn’t stitch over the open end of the zipper so that I could still close it all the way. Backstitch at the beginning and end or pull your threads to the back and tie them off. I always use a longer stitch length when I topstitch. It looks nicer and is less likely to pucker when you have so many layers. Somewhere between 3.5-4mm.

Add a split ring and your earbuds and you are done!

Comments

suzee says:


Stern aus Resten

 lange Zeit habe ich meine Reste farblich sortiert zusammengenäht und wusste nicht, was ich daraus mache.

im Internet habe ich diesen Stern gesehen und dachte, er ist perfekt für meinen Reste.

der Stern ist ca 90 x 90 cm gross und muss noch gequiltet werden.


der Anfang mit Quilten ist gemacht, jetzt kommen demnächst die weissen Stoffe dran.


und heute Abend das Binding angenäht.


Donnerstag, 13. Mai 2021

ich bin eine alte Lederjacke....

 mal sehen, was daraus entsteht


der Anfang ist gemacht, die Jacke ist jetzt auseinandergeschnitten und besteht aus viele Einzelteilen, toller Reissverschluss und mehr, ich werde mal alles aufheben .Meine Vorstellung, eine große und eine kleine Tasche daraus zu nähen.


Dienstag, 11. Mai 2021

Designermantel wird zu Tasche

Von einer Freundin habe ich einen tollen Desigualmantel bekommen, mit der Bitte, eine Tasche daraus zu nähen. Meine Stoffschere hat manchmal bei dem dicken Stoff gestreikt, mit der Nähmaschine ging es gut zu nähen, entstanden sind zwei Taschen.


Dienstag, 4. Mai 2021

Donnerstag, 8. April 2021

Schlampermäpple

 mal wieder ein paar Schlampermäpple für Jung und Alt genäht. Das Muster ist wirklich sehr einfach und die Täschchen sind schnell genäht.


und noch mehr, für jung und alt


 ein kleiner Amishquilt, nach einer Idee von Esther Miller, in den Weihnachtstagen genäht, in den letzten Wochen handgequiltet.


Oma näht

 da ich demnächst meine Enkel besuche und ich noch einen netten Froschstoff hatte, habe  ich für die Beiden zwei Kleinigkeiten genäht.

Leon das Schulkind bekommt ein Schlampermäpple mit einer Überraschung drin.

Elias, der seit kurzem in den Kindergarten geht , bekommt einen Beutel für Wächselwäsche.


Rucksack

 nach den vielen Taschen musste ich unbedingt einen Rucksack nähen.


der Rucksack war eigentlich schnell genäht, ein wenig Kork, Weltkartenstoff  und Leinen.

Nur mit den Ösen tat ich mir schwer. 


noch zwei weiter folgen:


Freitag, 19. März 2021

Cloe2go

 seit gestern habe ich ein neues Handy, ist ja schön, aber leider ist die kleine Cleo2go jetzt etwas zu klein. 

Das Handy geht nicht mehr rein, also muss eine neue Tasche her, in die Geldbeutel, Fahrzeugpapiere Schlüssel und Handy passen.

Da ich den Cleo2go Schnitt gerne mag, habe ich ihn vergrößert.

ein Stück Leder, Jeansstoff in schwarz, ein interesannter Futterstoff und verschiedenes Zubehör liegt bereit, also kann das Wetter am Wochenende ruhig schlecht werden, ich bin beschäftigt.

passend zu der kleinen Tasche gibt es noch eine zum ausgehen, entweder für die Arbeit, oder zum einkaufen


Sie besteht aus verschiedenen Materialien : Kork, Leder, Kunstleder, Jeans und Leinen.

Einmal Vorderseite, einmal Rückseite


Mittwoch, 10. März 2021

nochmals eine Tasche

 vor einiger Zeit habe ich mal eine Trachtenlederjacke zur Verarbeitung geschenkt bekommen.

Heute war endlich der Tag, wo ich die Jacke in ihre Einzelteile zerlegt habe,  und die Tasche genäht habe, da ich kein Trachtenfan bin, bekommt sie die Spenderin wieder zurück.


Samstag, 6. März 2021

Taschen


neue Tasche aus einer zu kleinen Edeljeans, Kork, Baumwolle mit Parismotiven und als Futter Leinenstoff.


und aus den Resten nochmal eine:


 die letzten dieser Serie


Sonntag, 14. Februar 2021

Taschen hat Frau nie genug.

https://youtu.be/QSkqRwyNutY


eine Gürteltasche, unter Umständen kommt noch ein Träger dazu, ich suche ein schmales Lederband dafür. Für die Tasche hatte ich eine tolle Edeljeans, die ich vor Jahren mal geschenkt bekommen habe.


innen sieht die Tasche so aus:


Mittwoch, 10. Februar 2021

Trauercollagen

 mal ganz was anderes, diese beiden Collagen habe ich für mein Altenheim gemacht, dort werden sie auf den Wohnbereichen aufgehängt.

ich habe dazu alte Zeitungen und Spitzen benutzt


Samstag, 6. Februar 2021

Freitag, 5. Februar 2021

FFP Masken Täschchen, auch für Kaffeefilter geeignet

https://sewsimple.de/kaffeefilter-tasche-naehen-anleitung/ 


https://youtu.be/D10jaTz3OHU


ich habe drei verschiedene Größen genäht, bis ich endlich die richtige für die FFP Masken hatte. Also wer es versuchen will, Größe 4 ist ok. Leider hatte ich in dieser Größe nur einen Metallreissverschluss was mir für das Täschchen nicht gefällt.


und nochmal ein Maskentäschchen, das mir auch gefallen könnte:


https://youtu.be/eMdLYcpy5a8