Das ganze muss ich noch genauer anschauen, bin nicht so recht zufrieden.
Entstanden aus 2 Quadraten 30x 30cm

Das ganze muss ich noch genauer anschauen, bin nicht so recht zufrieden.
Entstanden aus 2 Quadraten 30x 30cm
seit langer Zeit nähe ich jetzte diese Täschchen, heute die letzten aus der Serie
.jpg)
1. für Pilger
2. Pflastertäschchen
3. Landfrauentäschchen
und zum Abschluss?? noch Yoga und Gymnastiktäschchen

dieses Täschchen habe ich heute entdeckt, und es hat mir keine Ruhe gelassen.
Reste hat man ja dafür genügend. Jetzt ist es fertig, ziemlich aufwendig zu nähen, und es steckt eine Menge Stoff darin, aber es hat Spass gemacht.

| |||
dieses Muster habe ich heute morgen im Internet gefunden und wollte es einfach mal ausprobieren.
es besteht aus einem Hexagon als Boden, an den zwei Seitenteilen ist das Hexagon etwas verkürzt.
Zum nähen, braucht man keine Anleitung, wenn die erste Naht fertig ist, sieht man schon wie es weitergeht.
Mein Hexagon hatte eine Seitenlänge von 4".
es wird warscheinlich bei einem Täschchen bleiben, obwohl die Form irgendwie interesannt ist.

verschiedene Täschchen aus zusammengesetzten Webkanten, dies gibt immer einen interesannten Stoff zum weiterverarbeiten


die Tasche "Offenherzig" von Sewsimple, die muss ich auch noch ausprobieren.
ihren Namen hat sie, weil sie sich weit öffnen lässt

| |||
Stoff dient nur als Beispiel, mal sehen, was ich dafür nehme:

zu Weihnachten gabs die AZRA Täschchen, etwas kompliziert mit de türkischen Ecken, aber ansonsten ein nettes Muster
https://sewsimple.de/tasche-mit-tuerkischen-ecken-naehen/


Küss mich, ich bin ein Frosch

mit Schildkröten, sieht man erst , wenn man sie genau anschaut

für Strickerinnen

für Yogabegeisterte

und natürlich noch ein Pfotentäschchen
heute mal ein Schlampermäpple genäht
DIY Stiftemäppchen | Blog • alles-fuer-selbermacher" https://insider.alles-fuer-

hier noch welche, für kleine Dinofans und ein Mädchen:

https://sewsimple.de/maultasche-naehen/
so sehen die ersten aus, es gibt das Muster in 5 Größen , die ersten drei Größen habe ich genäht.
Gr. 1: Länge 14,5cm Breite 7,5cm
Gr. 2: Länge 17cm Breite 9cm
Gr. 3: Länge 18cm Breite 10cm
Gr. 4: Länge 27cm Breite 15cm
Gr. 5: Länge 30cm Breite 16,5cm
Gr. 6: Länge 34cm Breite 20cm
Gr. 7
die Maultäschchen sind auch nette kleine Geschenke:


dies war der Anfang!
habe jetzt so fast alle Größen genäht:

einmal alle Größen

Größe 1 für eine Yogafreundin


Größe 1 kann man immer gebrauchen


für Hühnerbegeisterte Stricker
Turnbeutel, als kleiner Rucksack für den nächsten Camino und ein passendes Badetäschchen aus wasserdichtem Polyester genäht.

I use a little zippered pouch to carry around my earbuds since they are the fancy microphone ones and I don’t want them to break or get tangled. Some of you have commented that you are looking for some small, simple gift ideas. This is definitely simple to make, and a little more fun than the typical rectangular zippered pouch! I can see these as the perfect gift for teenage cousins or nieces or girlfriends or even teacher gifts. Fun, quick, and cute! It doesn’t take very much fabric so you could even use scraps! Sometimes I have the perfect fabric for something but I only have a fat quarter, or I want to make something extra with the leftovers from another project. This is perfect for that. You could even use 5″ charm squares! You can enlarge any of the photos by clicking on them, if you need to. This is a very basic zippered pouch, so hopefully some of you beginners will try making one!
UPDATE: I have completely re-written this tutorial with twice as many bright, clear photos and more detailed instructions and it is available as a pattern in my pattern shop. The free tutorial is still available below!

First, download the pattern template HERE.
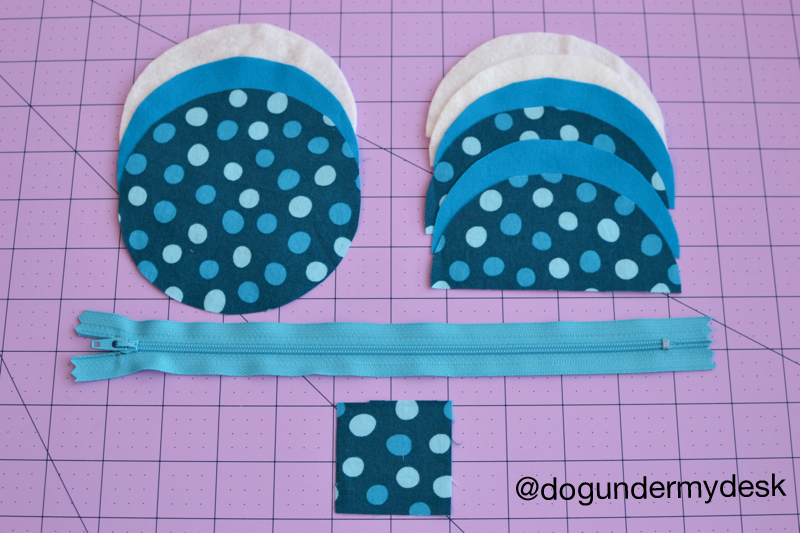
Cut from main fabric:
1 circle
2 half circles
1 tab
Cut from lining fabric:
1 circle
2 half circles
Cut from batting (or medium weight interfacing, if you prefer): 1 circle
2 half circles
You will also need a 1″ wide nylon 5″ or longer zipper.
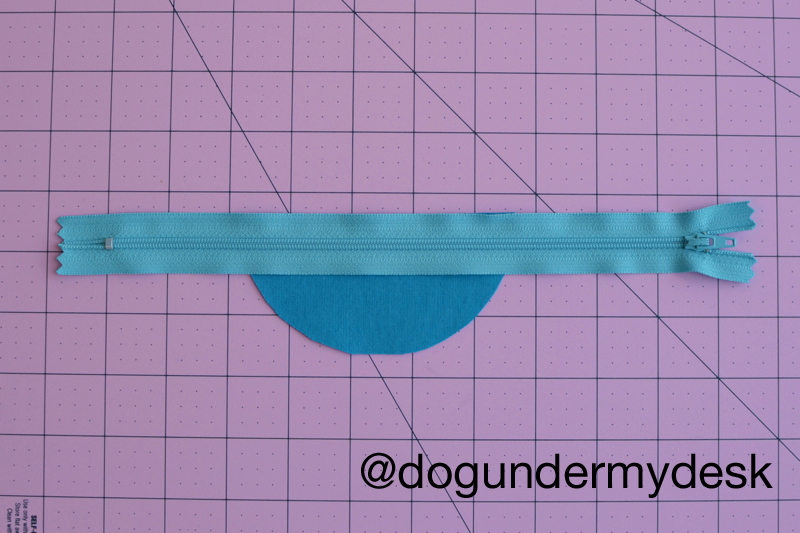
Place one lining half circle right side up and place the zipper right side up on top. Align top edges.
Place a main fabric half circle wrong side up (right side together with the zipper). Place batting on top.

Sew with a 1/4″ seam allowance. It’s important to use a 1/4″ SA here because the zipper is 1″ wide, and if we use two 1/4″ seam allowances we are subtracting 1/4″ from each half circle but adding 1/2″ in the middle of the zipper. Perfect!

Fold back and repeat with the other side. Then trim the batting as best you can without cutting into the fabric.

Fold everything back and press well.

Make sure the back side is away from the zip as well.

Topstitch 1/8″ away from the edge with a longer stitch length.

Now make the tab for the side. Fold the tab in fourths – Fold the edges to the center and then fold in half and topstitch.


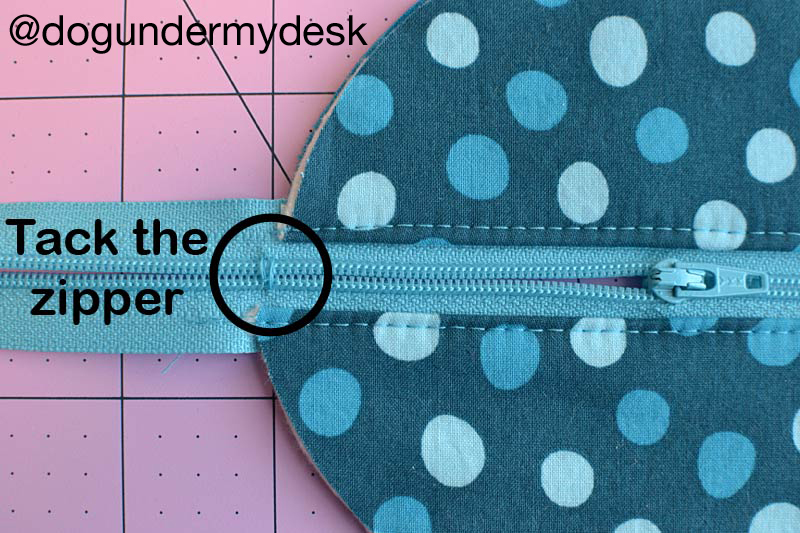
Fold the tab in half and place it with the raw edges towards the outside of the circle, folded edge in, right over the zipper and sew it at the same spot where you tacked the zip.
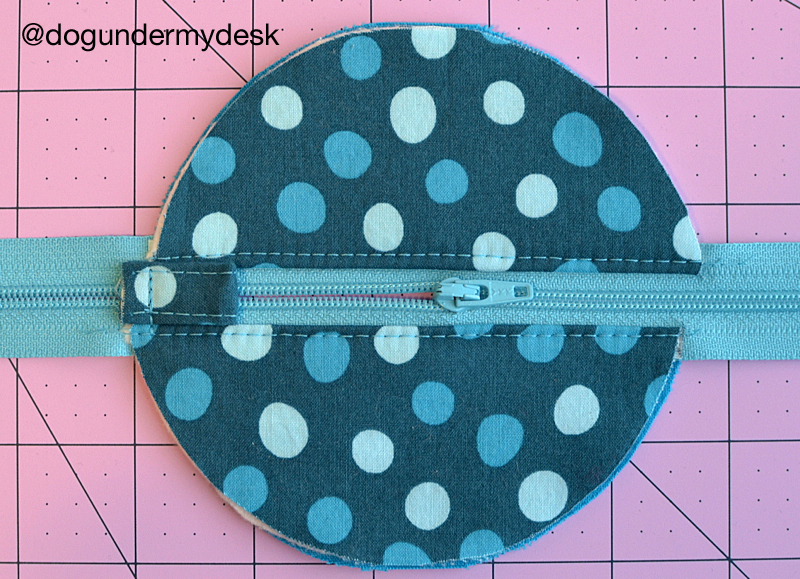
Now you need to place the circle pieces wrong sides together with the batting in the middle. Place the lining circle wrong side up. (I’m using solids so it doesn’t matter, but if you are using a print, place it right side DOWN, wrong side up.) Place the cotton batting on top. Place the main fabric circle on top of that. Like a quilt sandwich. It’s so small you don’t really need to pin. If you used fusible interfacing in place of batting, just place the two fabrics wrong sides together.


You should now have these two pieces. Make sure the zipper pull is IN THE MIDDLE of the circle. You don’t want to end up cutting it off!

Flip the full circle piece over on top of the piece with the zipper, right sides together. (Now, if I was showing you how to do this the “right” way, I would tell you to baste with a 1/8″ seam allowance around the outsides first. But this is a small pouch, and it will be fine if you don’t baste. Plus, it’s just for fun. Not basting also makes it easier to trim the batting after sewing!)

Time to sew! Start anywhere on the circle and sew all the way around with a 3/8″ seam allowance.
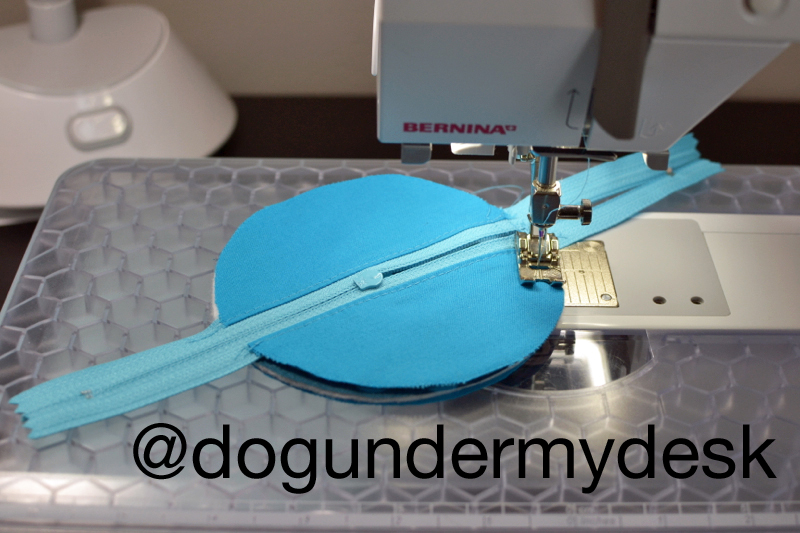
Since we didn’t use interfacing AND we are sewing in a circle, you might get some puckering (fusible interfacing helps keep the fabric stiffer so it doesn’t pucker as much.) It’s OK. Just lift up the presser foot every few stitches, pivot, smooth out the pucker and keep sewing.


Now cut off the zipper ends. Just don’t use your good fabric scissors! I keep an extra pair of scissors around of opening packages, cutting paper and cutting off ends of zippers.

Now pull back the fabric and try to trim as much batting out as you can without slicing fabric. I use sharp, tiny scissors for this. It’s not imperative but I think it helps reduce bulk.
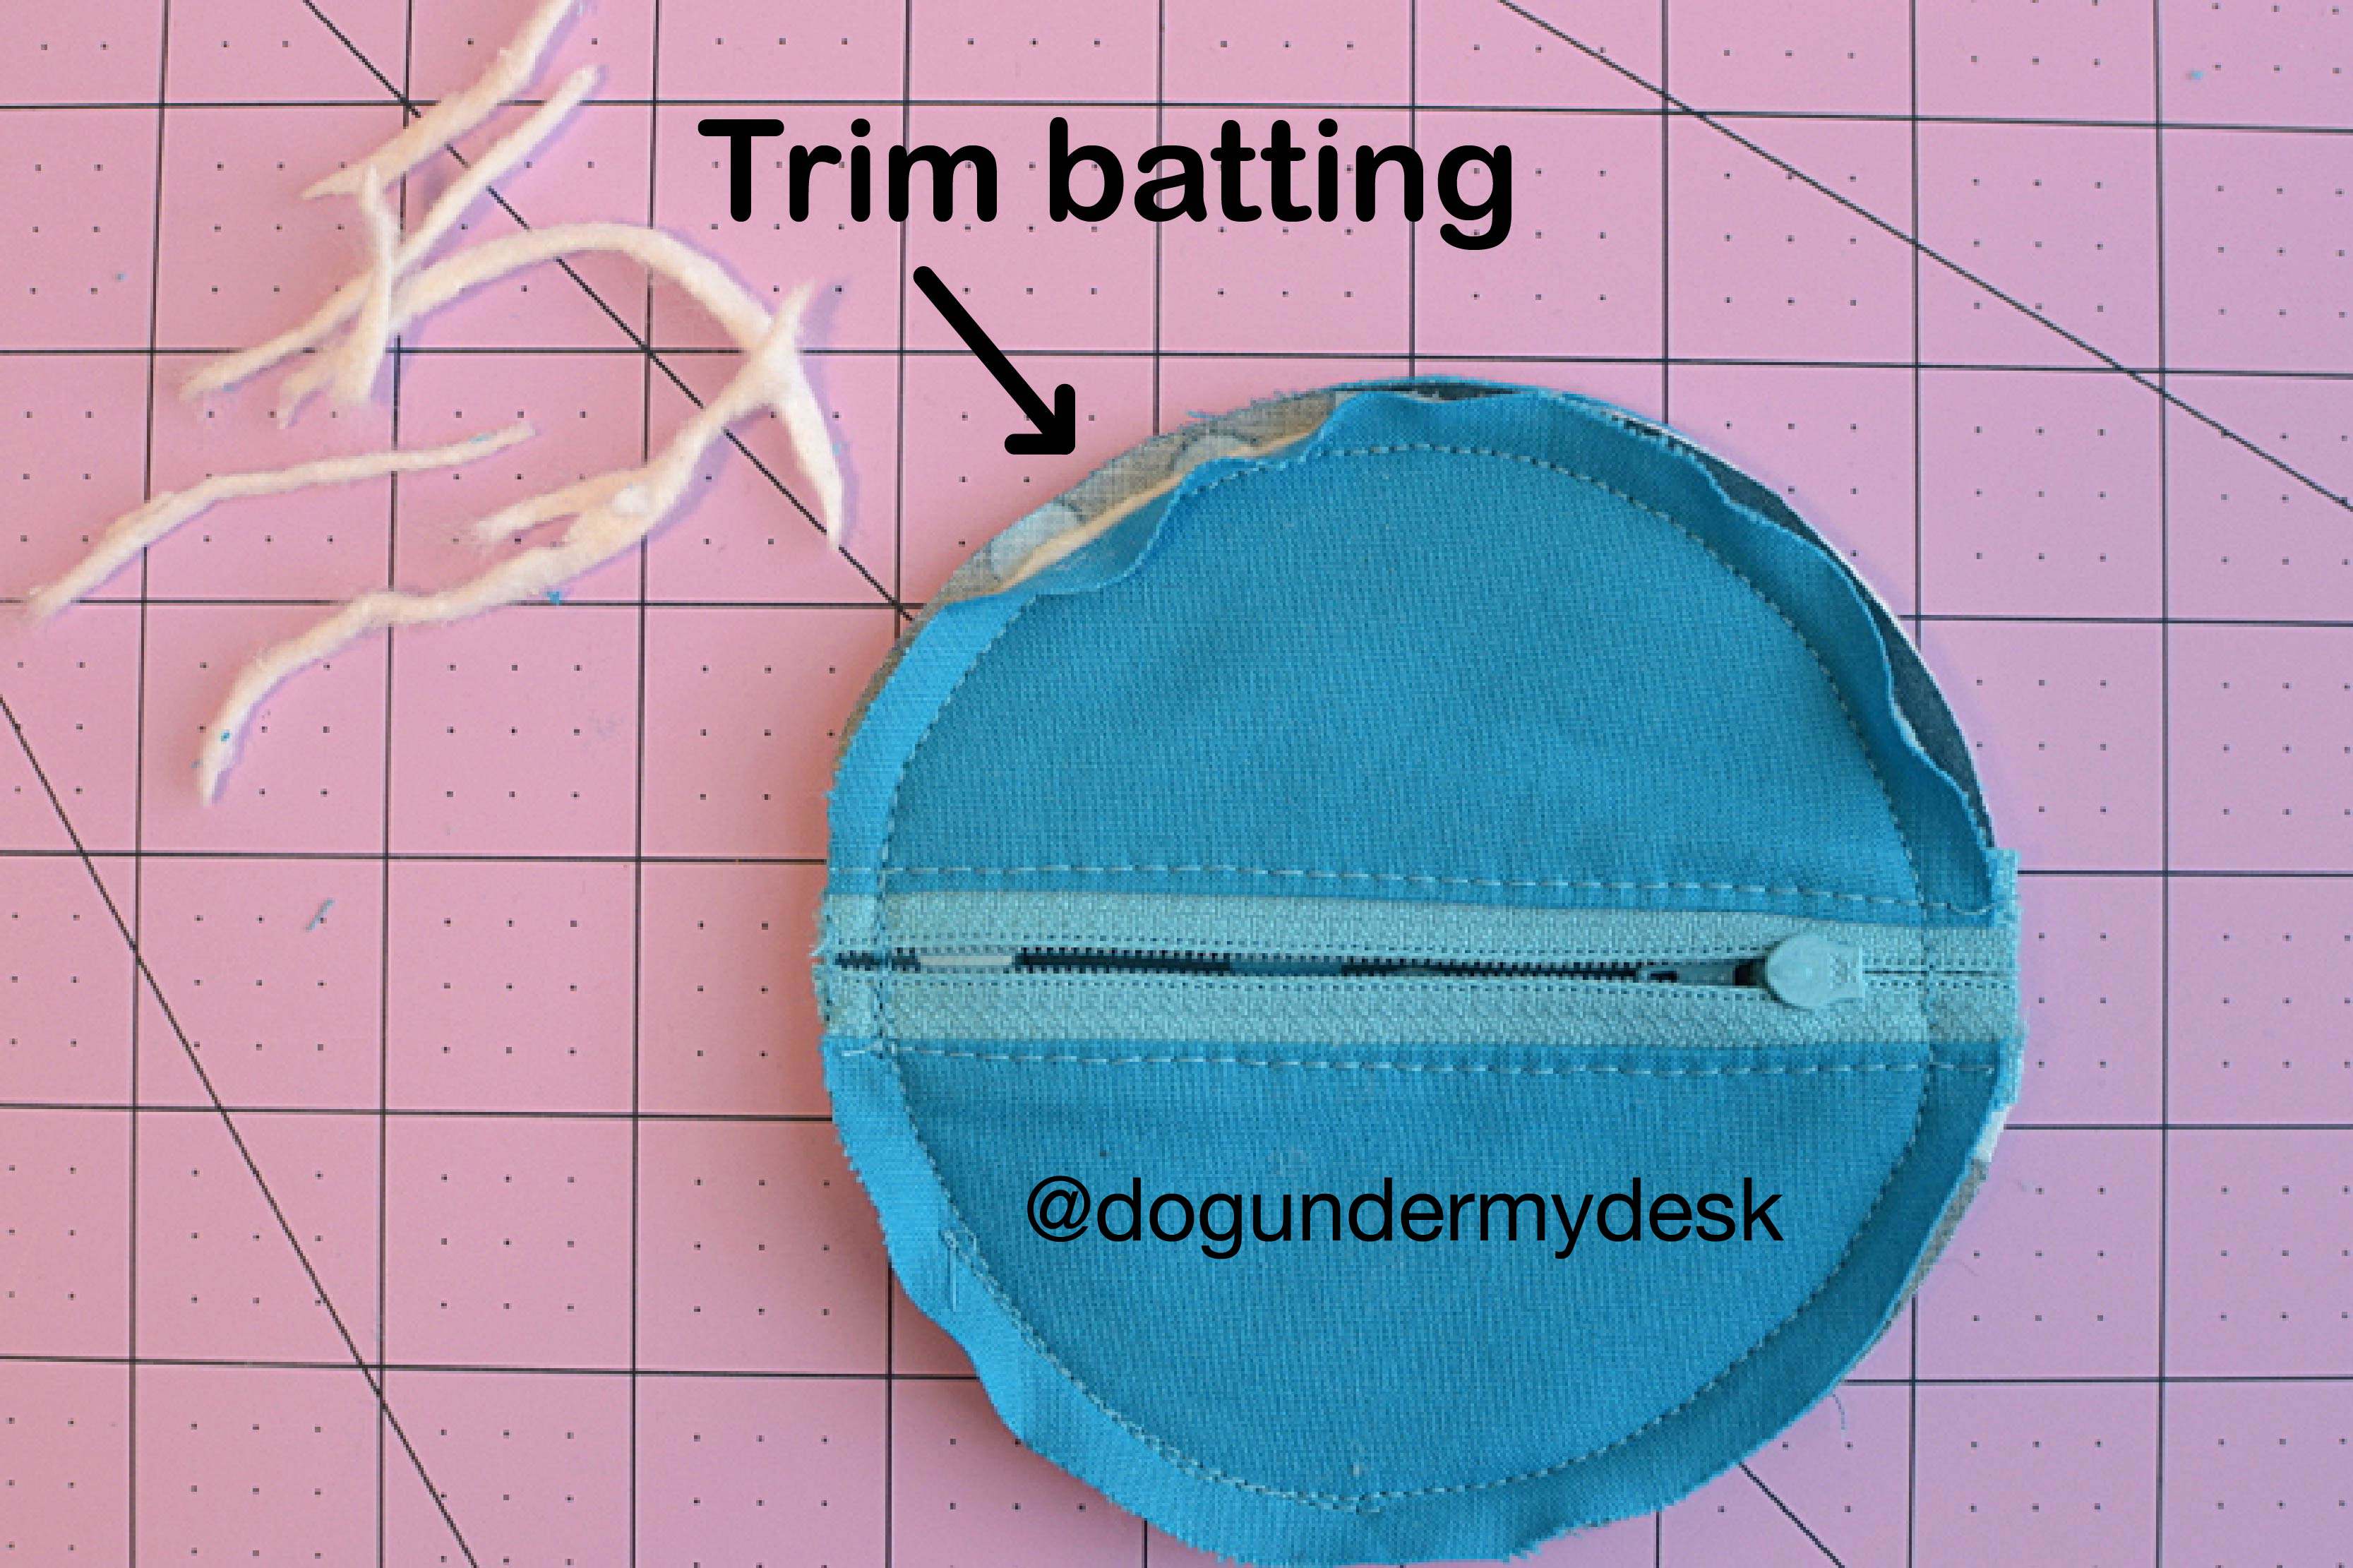
Trim the seam allowances a bit less than 1/4″. I used pinking shears but it will be fine if you don’t – just clip the curves. Turn the pouch right side out. Topstitch around the outside with a 1/4″ seam allowance to enclose the raw edges.

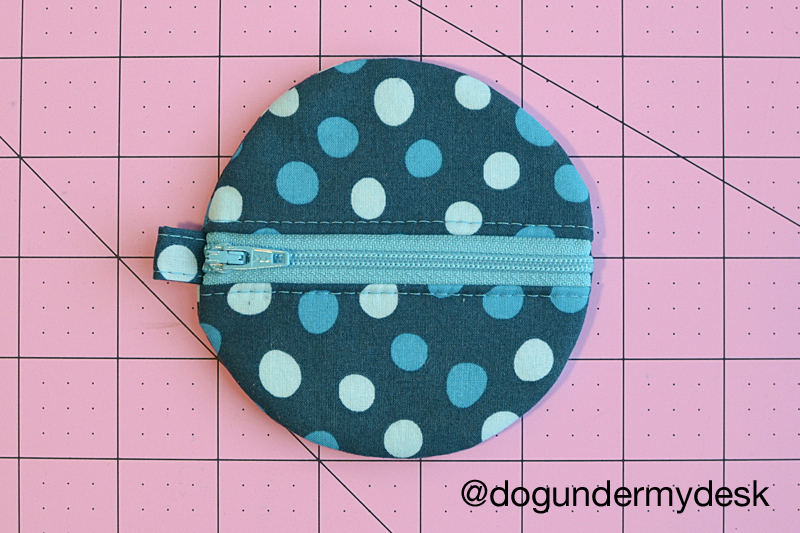
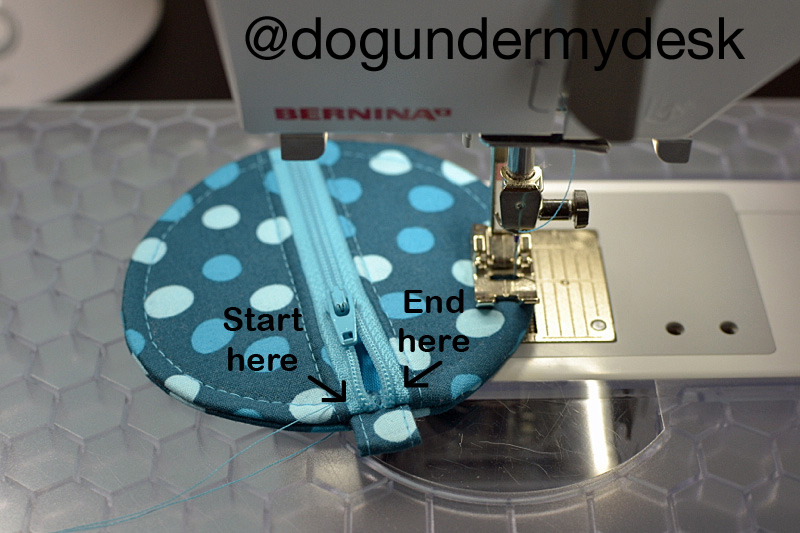
Add a split ring and your earbuds and you are done!

 suzee says:


